How it works
Six short steps from the first note to the last technique. Everything below is how the app behaves today.
Step 1
Your notes, or automatic ones
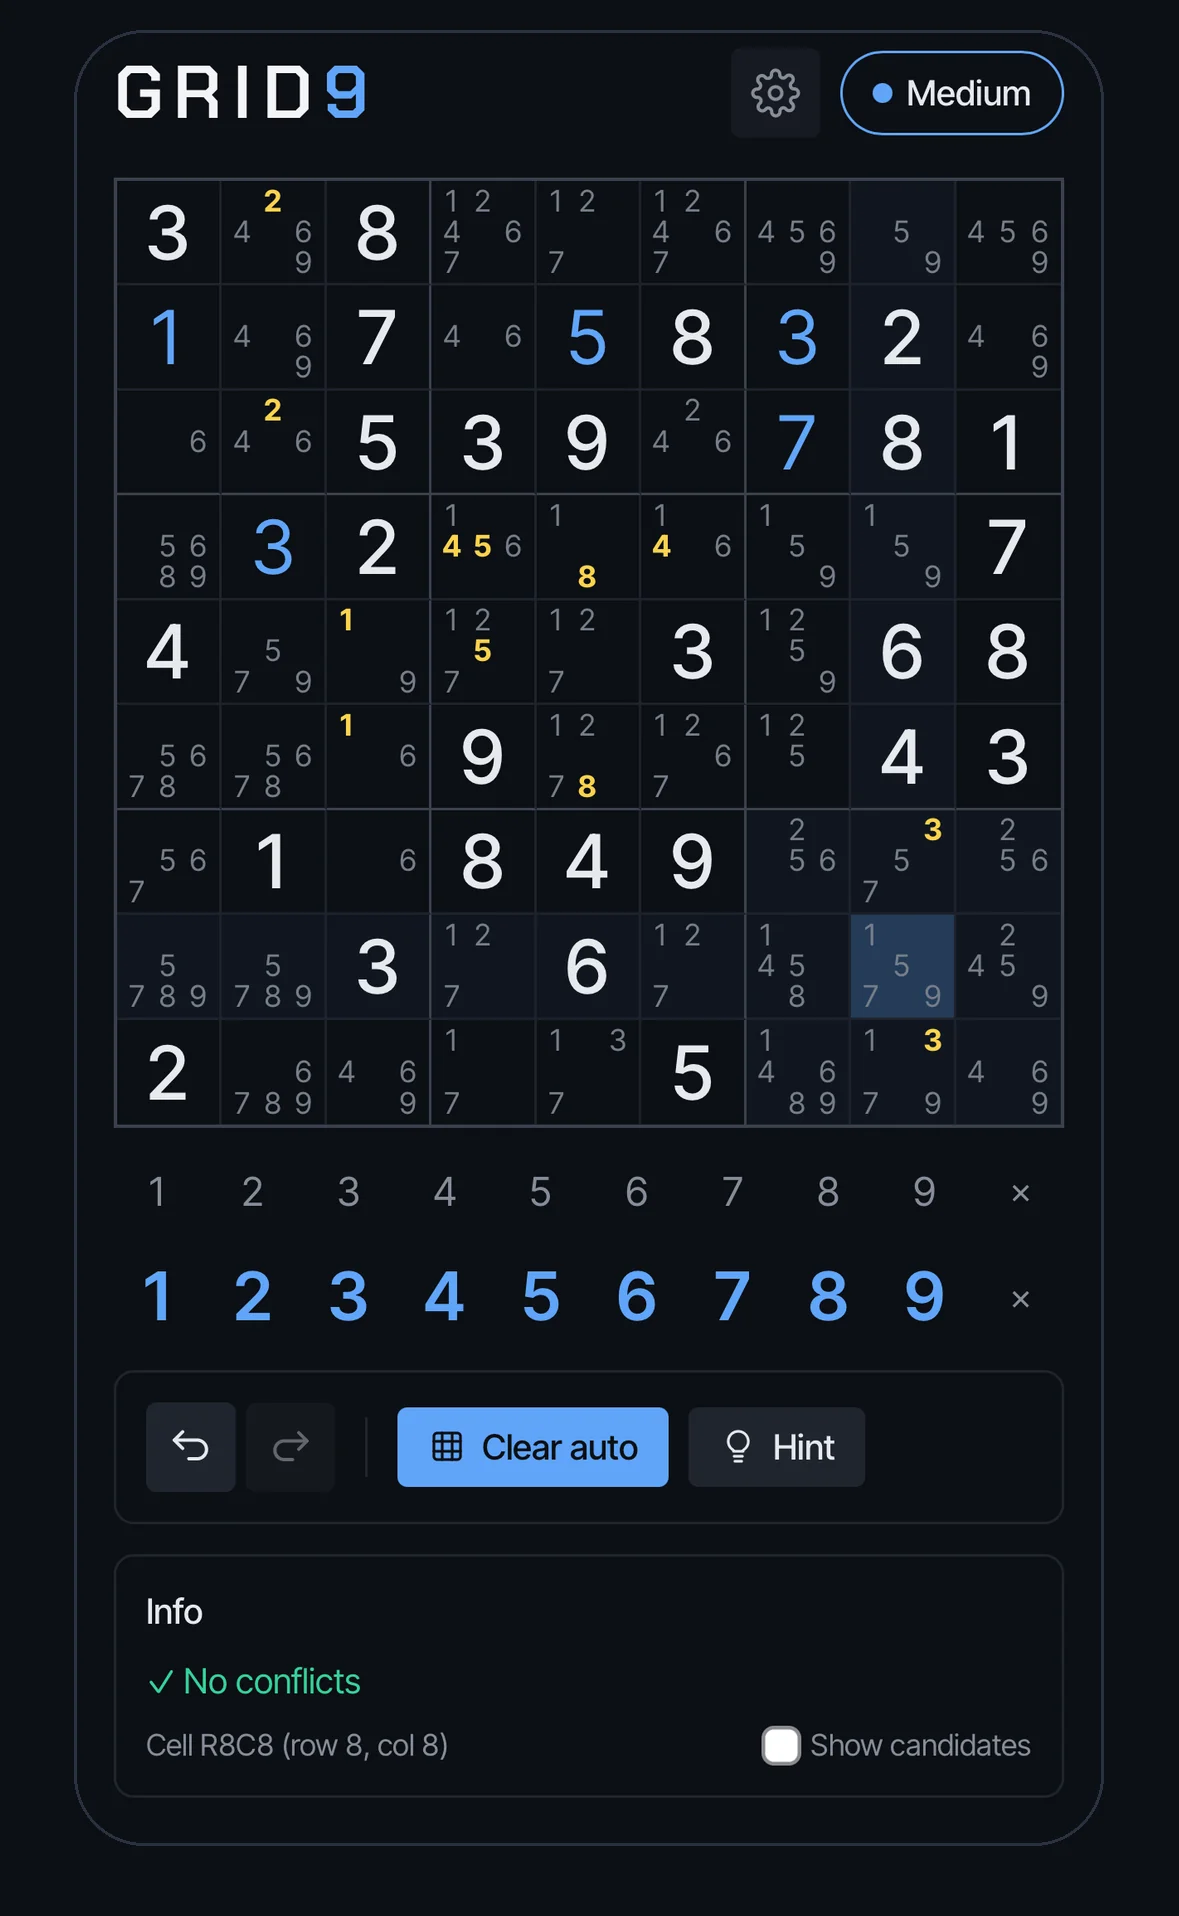
Grid9 has two kinds of candidates, and you can use either or both.
- Your own notes (amber). Tap a number in the grey Notes row to note it (the blue Digits row below places the number itself). These are Snyder-style marks: you only write a number where it has at most two or three places left in a row, column or box. They work completely on their own — you never have to touch the automatic fill.
- Automatic candidates (grey). Fill auto adds every number that is still legal in each cell, based on the values already placed.
Good to know: Fill auto never removes candidates using a technique. To eliminate with a technique, you run it from the strategy panel — that is where the learning happens.
Example A cell where your notes say 1, 7 but automatic candidates would show 1, 3, 7, 8, 9.
Step 2
See what is available
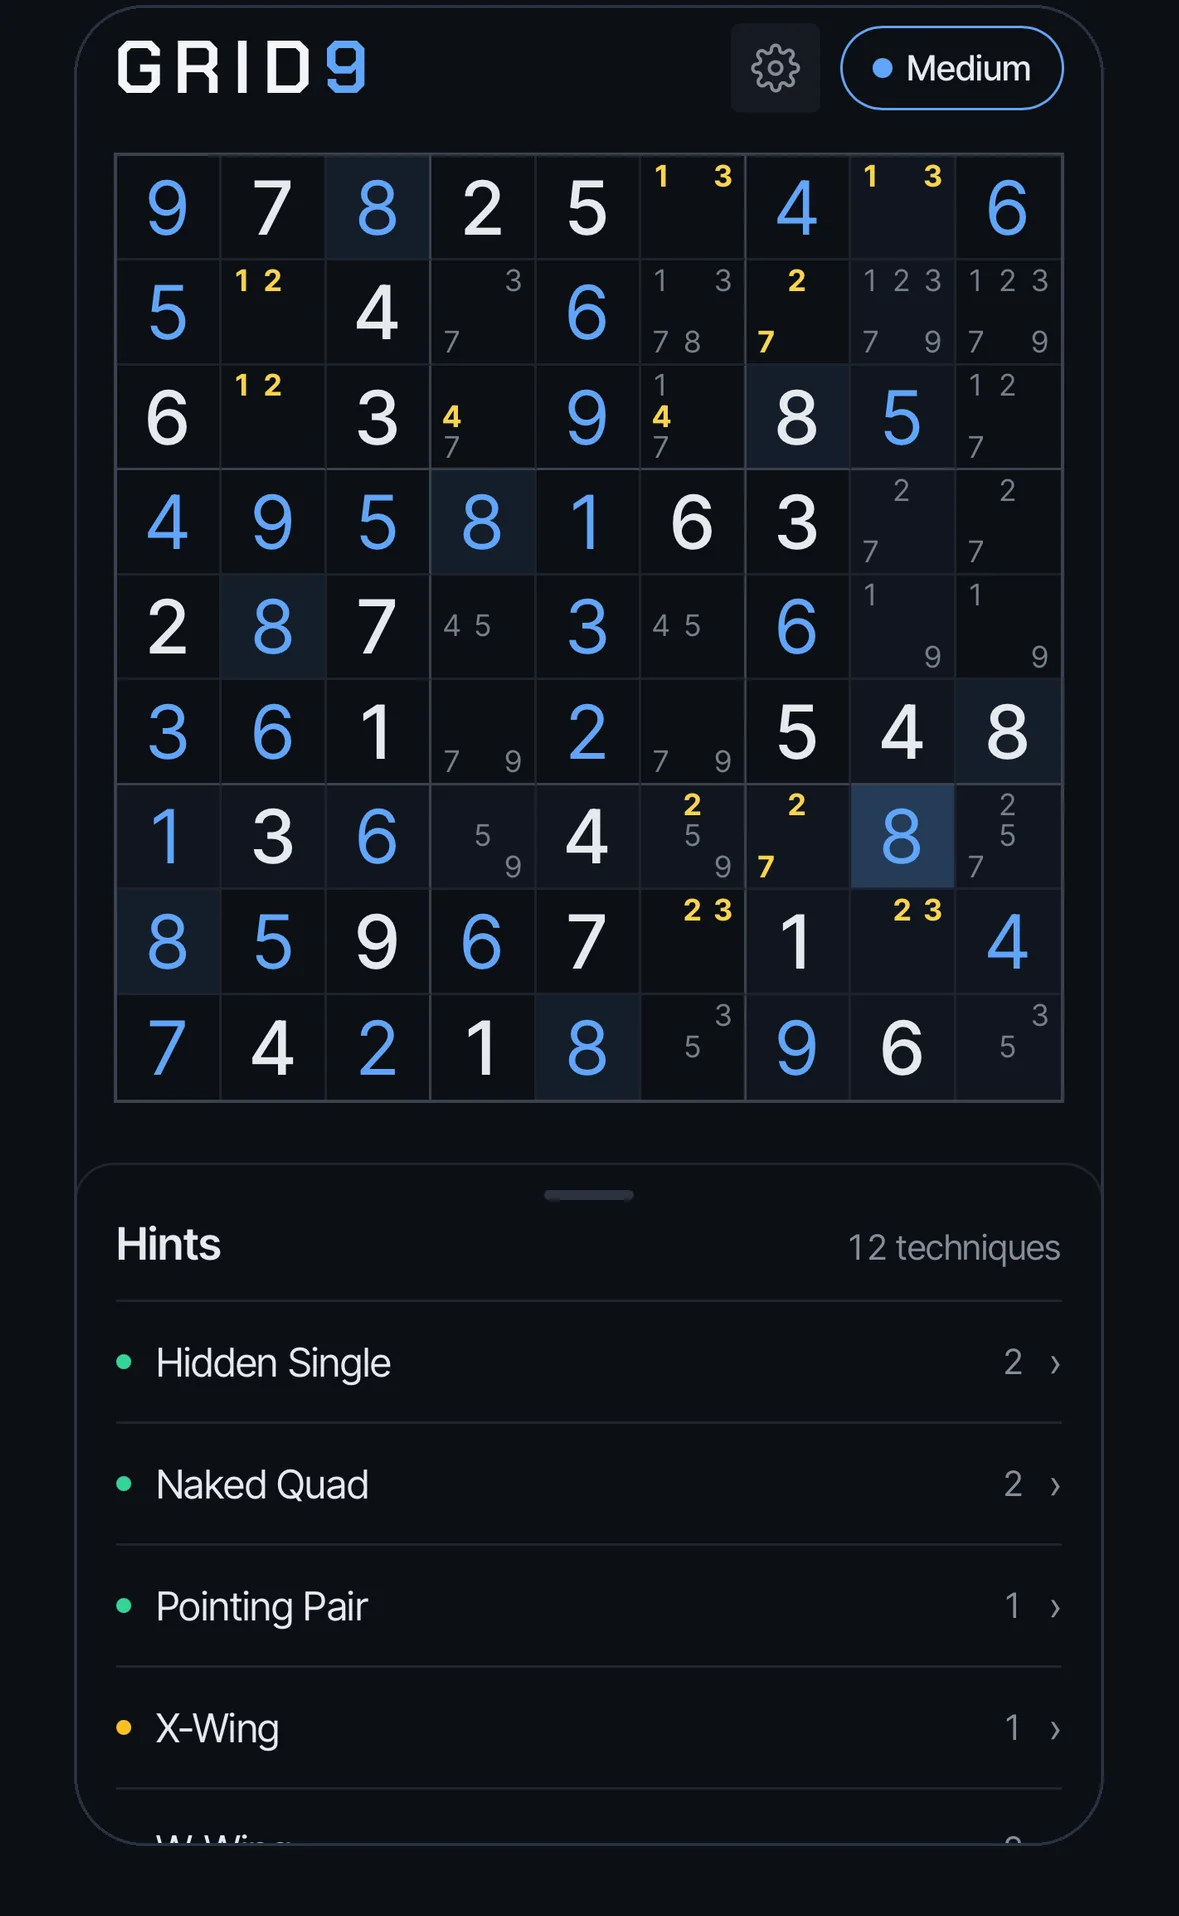
Tap Hint and a panel slides up from the bottom, with the grid still visible above it. It lists only the techniques that have a hit right now, with a count.
That makes the list an answer to “what can I do here?” — you see that a Naked Pair exists, and how many Naked Singles, without being told where.
Example Naked Single 5 · Hidden Single 2 · Naked Pair 1
Step 3
Help in doses
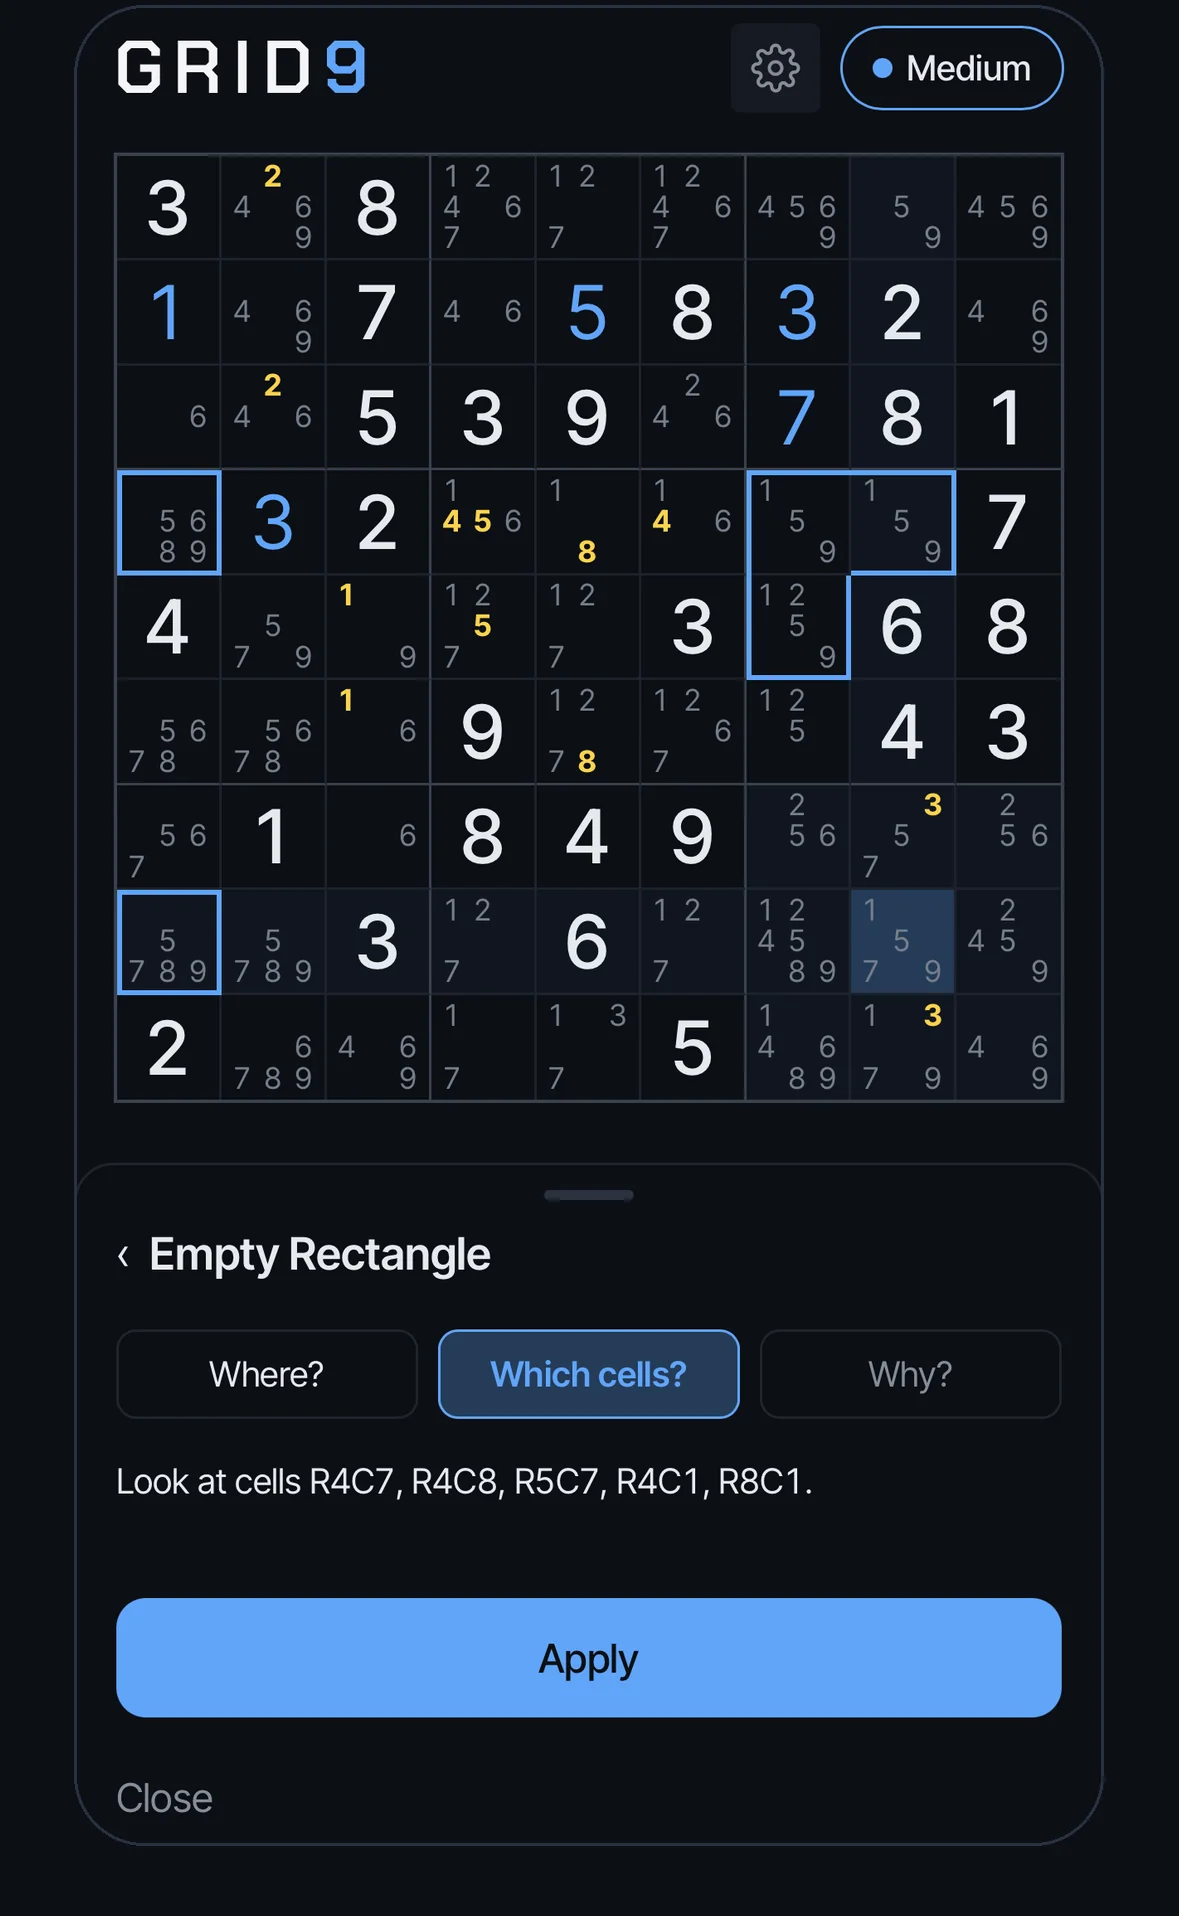
Choose a technique and its detail view opens with a step ladder. Each step gives a bit more help, and you decide how far to go before solving the rest yourself.
- Where? The mildest hint: where to start looking. Try it yourself before going further.
- Which cells? Shows exactly which cells the technique involves.
- Why? The full reasoning — why the pattern works and what it lets you remove.
- Apply carries out the move for you.
Next hit is something different: it jumps to the next occurrence of the same technique on the board, if there is more than one.
Step 4
Reading the highlights
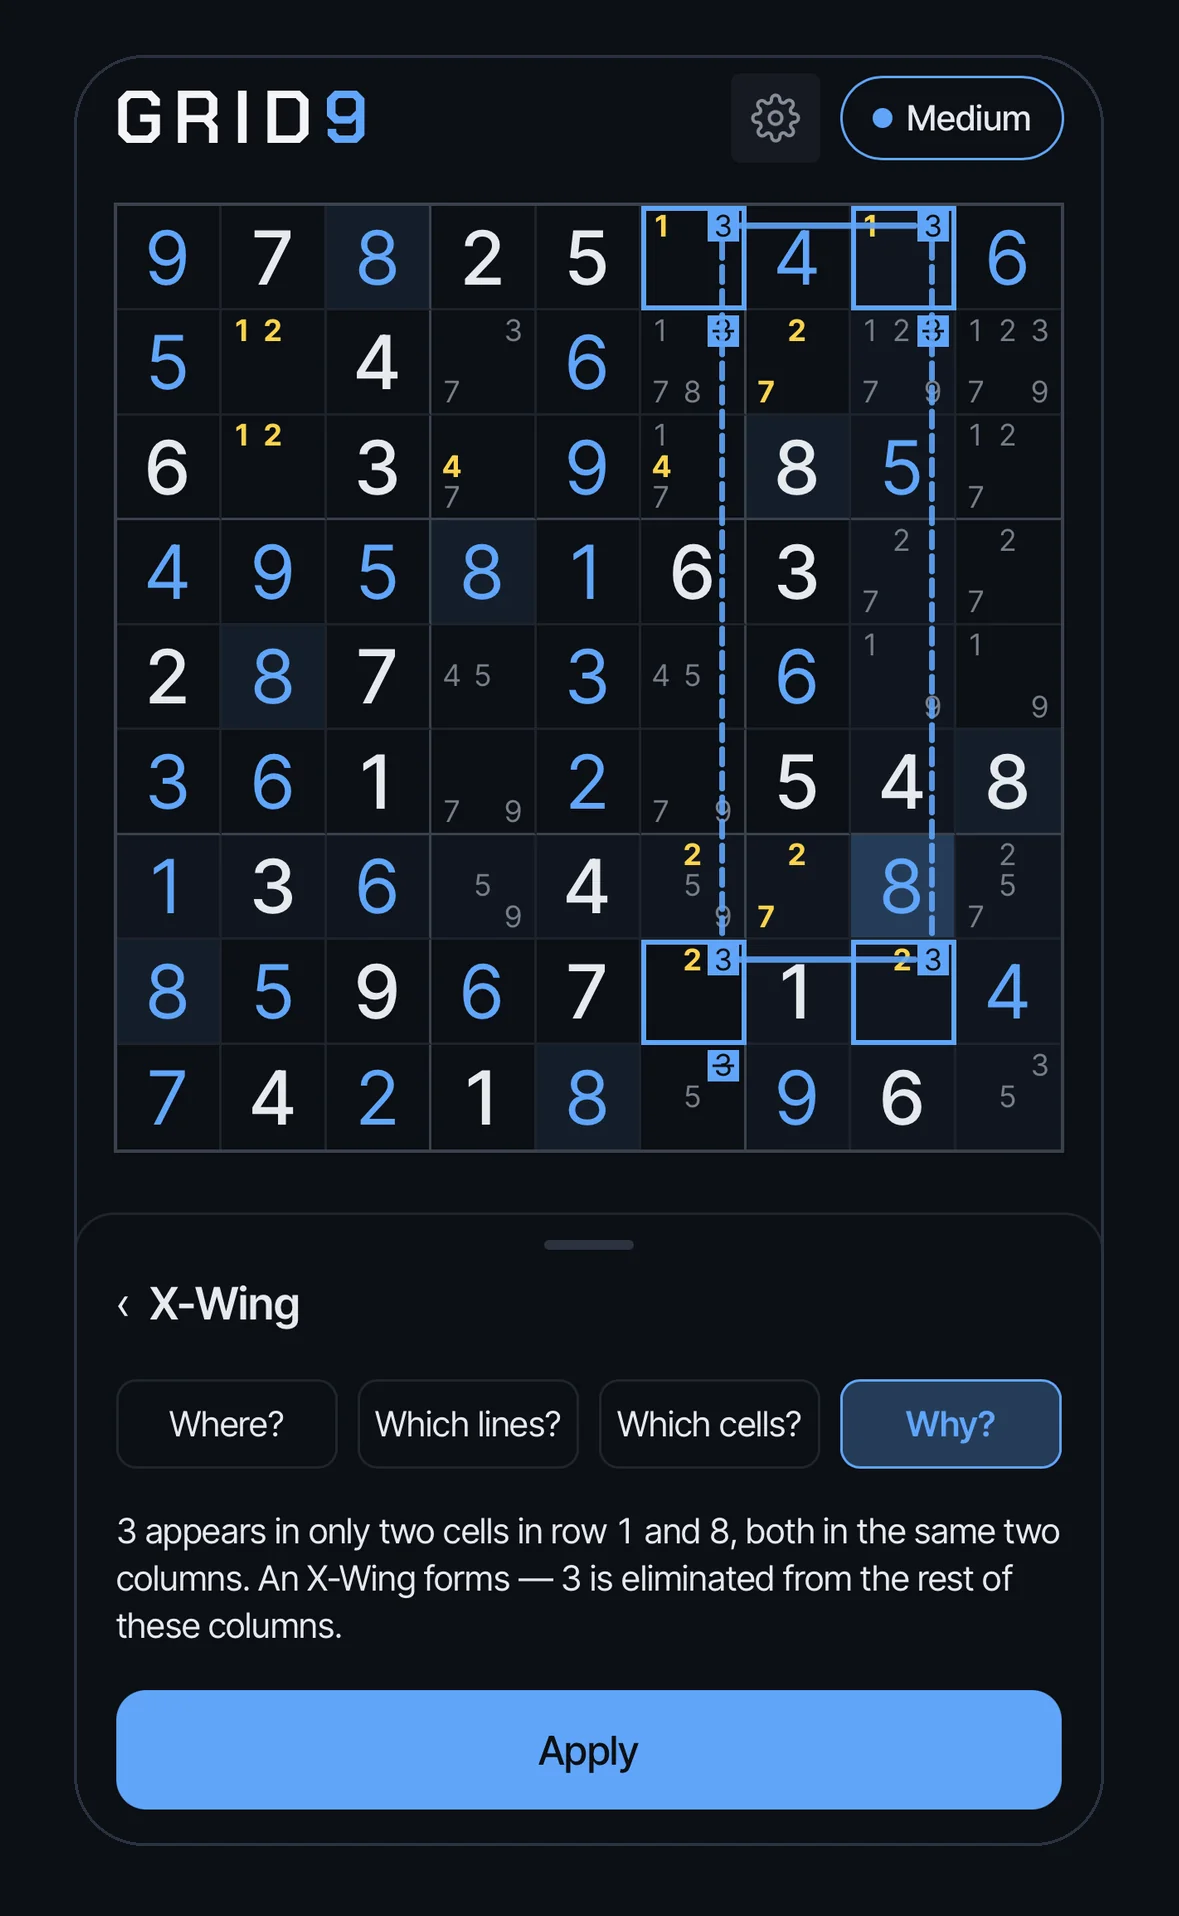
Hints are drawn so that shape carries the meaning, not just colour:
- A solid outline marks the evidence — the cells that form the pattern.
- A dashed outline with a struck-through digit marks what can be eliminated.
- A bold digit is the number that matters in the pattern.
- For techniques where geometry is the argument (X-Wing, wings, chains) lines between cells show the shape.
The same language is used for every technique, so once you can read one hint you can read them all.
Step 5
Practise a technique
Open the technique library, choose a technique, and Grid9 gives you a puzzle where it is needed. Two extra buttons appear above the step ladder:
- Explanation — the full write-up of the technique, with diagrams. Reading it is always free.
- Step by step — walks the exact reasoning chain one link at a time, forwards or backwards, instead of only showing the end result. Lost the thread? Step back and watch it again.
Step 6
Faster input, your own puzzles, your progress
- Multi-select. Drag across several cells to select them at once. Type a number or candidate and it is applied to all of them.
- Enter your own. Paste in a puzzle from a newspaper, a book or another app, to practise a specific problem or find out where you got stuck. Found in the menu.
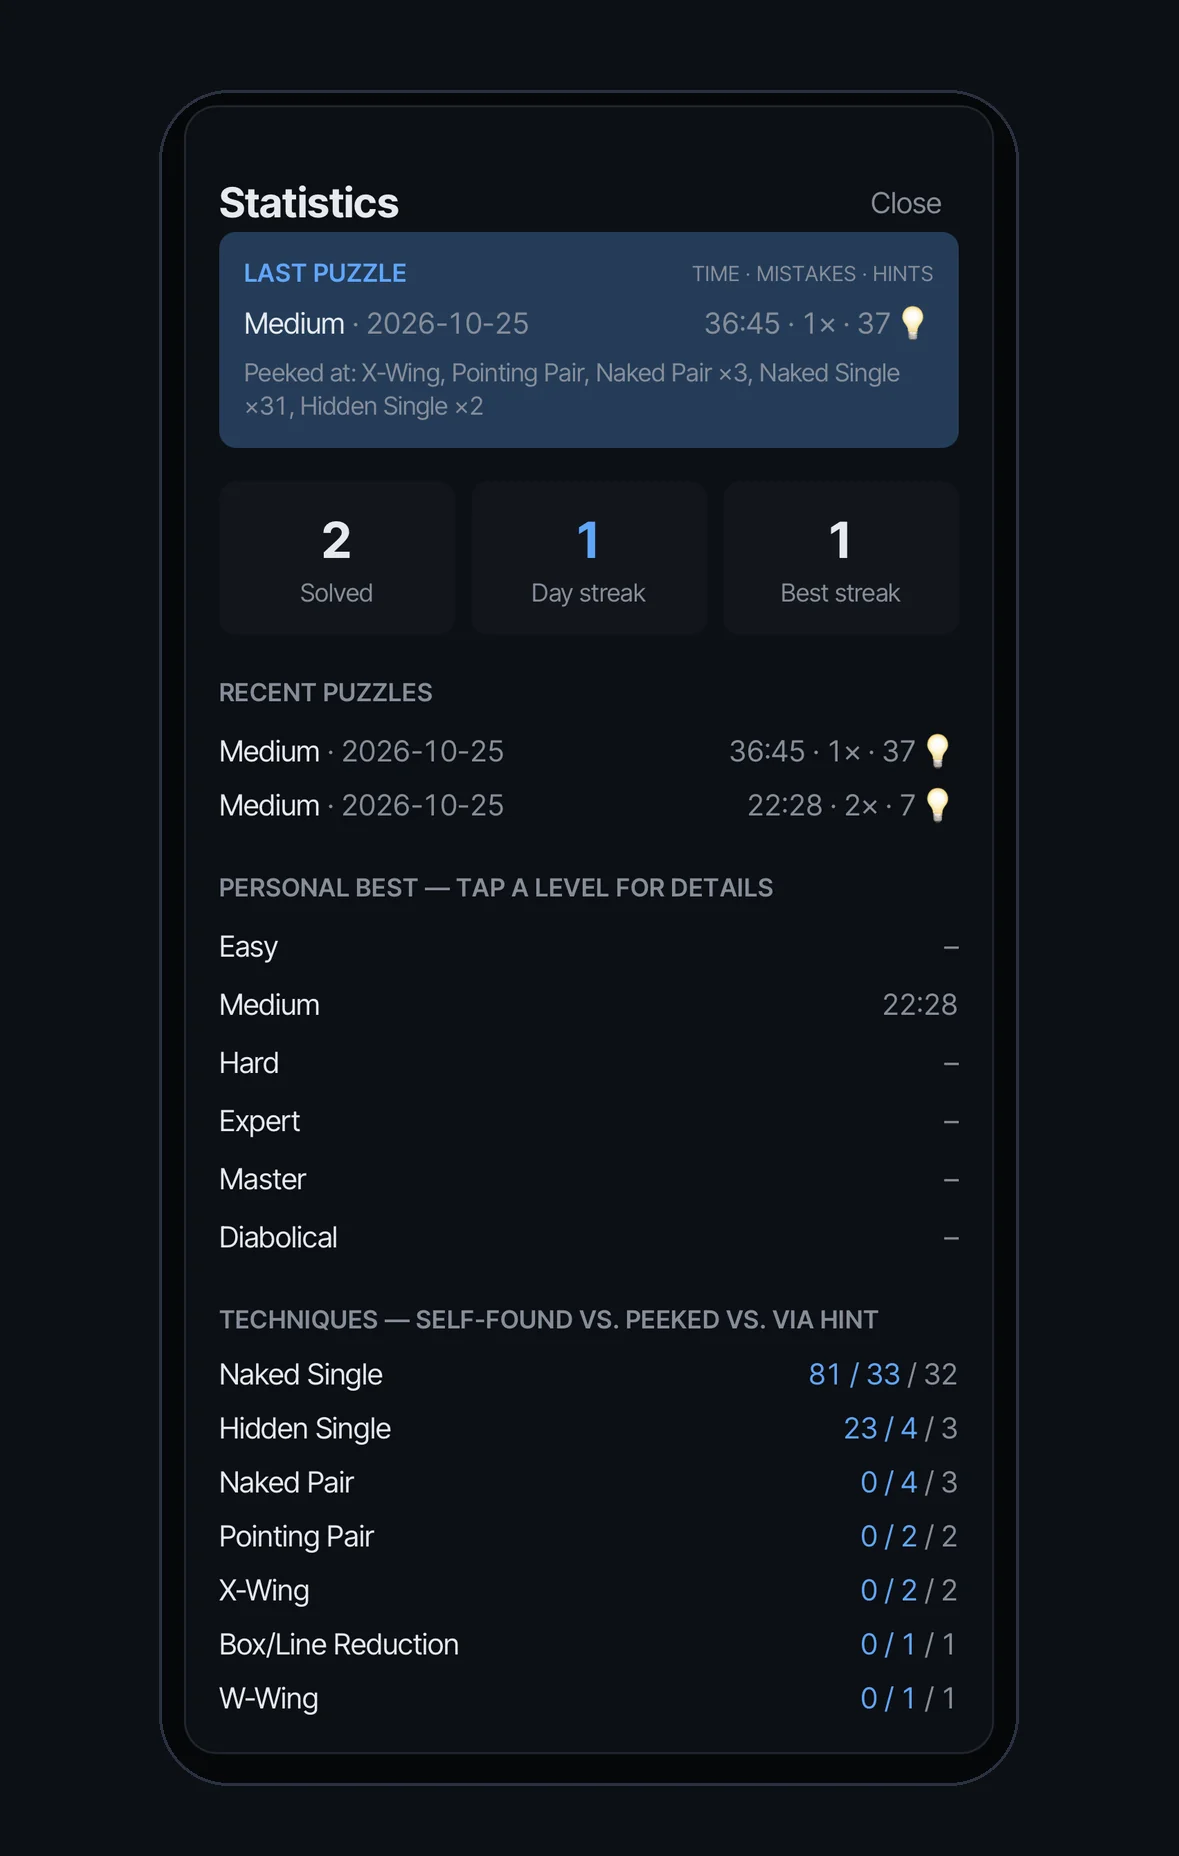
- Statistics. Every solve is tracked automatically: time, mistakes and hints used; which techniques you found yourself versus used a hint for; personal bests and a day streak.
Want to try it?
Coming soon to the App Store
Read the step-by-step guides → · See the full feature list →